Jump to content


Photo

TOS Bridge Scene for AA


  • Please log in to reply
31 replies to this topic

#21 sallah

sallah

    Herbert.

  • Members
  • 1,163 posts

Posted 04 November 2008 - 09:14 AM

Incredible job! Do the whole bridge! wink.gif

Sallah

#22 s8film40

s8film40

    New Forceaholic

  • Members
  • 862 posts
  • Gender:Male
  • Location:Celebration, FL

Posted 08 November 2008 - 12:19 PM

I'm almost done with the second one Here's a side by comparison to the old one.


#23 Samwise Gamgee

Samwise Gamgee

    Rick & Pat know me by name.

  • Members
  • 339 posts
  • Location:KS

Posted 09 November 2008 - 11:58 AM

Dude, you are just speeding through this with amazing accuracy and detail! What is your secret? Could you please post the dimensions or specs?

#24 s8film40

s8film40

    New Forceaholic

  • Members
  • 862 posts
  • Gender:Male
  • Location:Celebration, FL

Posted 09 November 2008 - 01:56 PM

QUOTE (Samwise Gamgee @ Nov 9 2008, 12:58 PM) <{POST_SNAPBACK}>
Dude, you are just speeding through this with amazing accuracy and detail! What is your secret? Could you please post the dimensions or specs?

I had intended to record the measurements and maybe make some templates as I went but I kept modifying it to get the angles right and lost track. I need to work on another one and go real slow and create a pattern especially if I want to make more of the bridge. But my source of information has been the McMasters blueprints, I printed it out and used my scale to transfer the dimensions.

#25 s8film40

s8film40

    New Forceaholic

  • Members
  • 862 posts
  • Gender:Male
  • Location:Celebration, FL

Posted 09 November 2008 - 02:09 PM

I finished the second one, As much as I like it, I decided to sell it, I'm going to put it on eBay tonight and see what I can get. I have exceeded my original budget for this project and I've realized if I want to increase the quality and efficiency of the work I really need to invest in some better tools.

TOS Bridge Scene Photos


#26 s8film40

s8film40

    New Forceaholic

  • Members
  • 862 posts
  • Gender:Male
  • Location:Celebration, FL

Posted 12 December 2008 - 01:22 PM

I have avoided making a chair since I've realized if I make one I'll probably have to sculpt it and I am not good at sculpting. So I decided to go ahead and give it a try and as I expected I'm not very happy with it. I flattened out some clay and cut it to shape. My first mistake was making the back a little shorter than it should be. Anyway I baked it and painted it the blue is a little dark. Anyway I'm not discouraged to the point of giving up but I have a lot of work to do to get this looking right. If anyone has any tips or ideas for making the chairs let me know.


#27 DavAnthony

DavAnthony

    Rick & Pat know me by name.

  • Members
  • 389 posts

Posted 13 December 2008 - 10:58 AM

My one suggestion is something I've been thinking about for a while. I don't have the casting/molding expereince yet but they make a product called Hydroschrink and Hydrospan. If you are able to get ahold of the old bridge model from a few years back you could literally expand one of the little model chairs into the 6" scale then just make molds of that chair and pop out however many you would need. I was actually thinking about doing that for the entire bridge at some point when I have the time and money.

#28 Tiberius

Tiberius

    New Forceaholic

  • Members
  • 817 posts
  • Gender:Male
  • Location:Calgary Canada

Posted 15 December 2008 - 12:13 AM

Dave is right about the Hydrospan, except that you would need to remould at least three times. Very wasteful, and expensive, besides those chairs are not the right shape either. There is another option though; I have tried it, and am still working on it, using the Hallmark Spock chair and expanding it once. The shape is closer to the right one, the back is a bit small, but not too far off. You might even be able to use the Uhura one, but I have not seen it to know for sure. Here is Playmates Kirk in the chair:

here is a side by side of one I tried to make out of clay, to show you I am not all talk... tongue.gif

I am having trouble with the legs, I cant quite figure out which way to mould that will not break on opening, but I am getting there.

#29 s8film40

s8film40

    New Forceaholic

  • Members
  • 862 posts
  • Gender:Male
  • Location:Celebration, FL

Posted 30 September 2009 - 01:33 PM

After moving and having this in storage for a few months it didn't hold up too well. I'm going to try this again with more durable materials. Since I'm starting over again, there's one thing that has kind of bugged me, in reference photos I have noticed that the floor on the lower section is a much lighter color than the upper section. I presume this is carpet on the upper part and the bare soundstage floor on the lower. I have seen renderings that show that the bridge should have the carpet through out, so I'm wondering is what I have more accurate or should I go for the same color flooring throughout, any thoughts?

#30 Prometheus

Prometheus

    If I don't have it, It's on preorder.

  • Members
  • 2,137 posts
  • Gender:Male
  • Location:Michigan

Posted 20 October 2009 - 09:03 PM

You really did agreat job on all of these !!!

#31 Prometheus

Prometheus

    If I don't have it, It's on preorder.

  • Members
  • 2,137 posts
  • Gender:Male
  • Location:Michigan

Posted 20 October 2009 - 09:10 PM

Would you consider making a classic bridge for a fellow TrekToy Forum Member wink.gif ?

#32 Sybeck1

Sybeck1

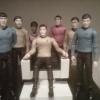
    Yes the Troi figures hair worries me.

  • Members
  • 1,006 posts
  • Gender:Male
  • Location:Southaven MS

Posted 06 July 2010 - 06:42 PM

What color gray have you been using for the walls?

Thanks


0 user(s) are reading this topic

0 members, 0 guests, 0 anonymous users