

 Find content
 Male
Male

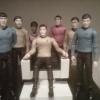

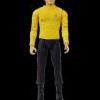
Here is a photo of a work-in-progress, my 1:10 scale original series Enterprise bridge, populated with Art Asylum action figures. None of the sections are finished, painted, are glued together yet, so please make allowances for the seams and other, obvious things that still need to be taken care of.
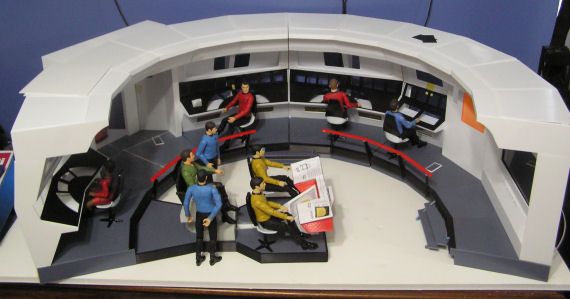
The model is nearly 3 feet in diameter and roughly a foot tall.
Nearly all of the parts that you see were 3D printed on a Makerbot Replicator 2, from models of my own design. The exceptions are the black bridge station tops and "backsplashes" which are cut from black sheet styrene.
With all of the main parts created, I have now turned towards some of the smaller pieces. My intent is to have all of the parts made before I start painting/wiring/assembly.
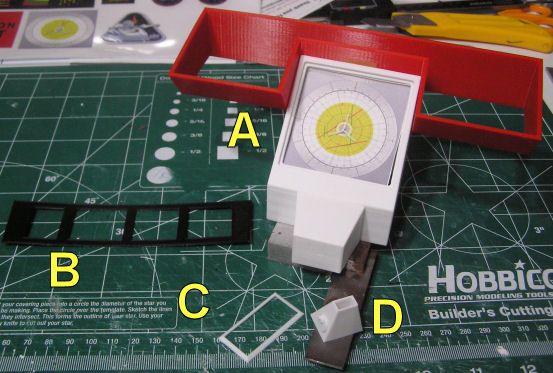
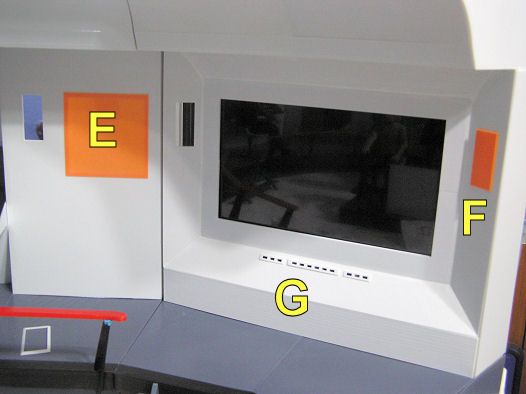
In the photos below:
A. The helm station. The red portion was created hollow to accommodate lighting. The top will be made from sheet styrene, and clear cast control panels. These parts were harder to make than I expected! The graphic shown is simply printed on paper in the photo, but will be a backlit transparency in the final build. This graphic is courtesy of feek61, webmaster of TOSGRAPHICS.COM, who has graciously offered to help me with this build by providing most of the "screen" graphics I will be using (more on this later!). Thanks a thousand times, Will!
B. Backsplash viewer frames. I have all of these made except for the two (2) needed for the Comm station.
C. Beveled frames to go around the red alert lights. One in the turbolift alcove and one on the panel to the left of the main viewscreen.
D. Bridge station scanner unit. Two. One for Scott's station and one for the environmental station. Hollow to allow for lighting. I may do one lit (on) and one dark (off) just for variety.
E. This orange panel snaps into the wall. I will add tiny jewels/beads to it to make the lights of the panel then cast it in clear epoxy.
F. This orange panel also snaps into the wall. I'll prepare as noted for "E" and cast two, one for either side of the viewscreen.
G. The frames for the viewscreen chaser lights. What you can't see in the photo is that the frames have dividers between the lights that form light blocking compartments.
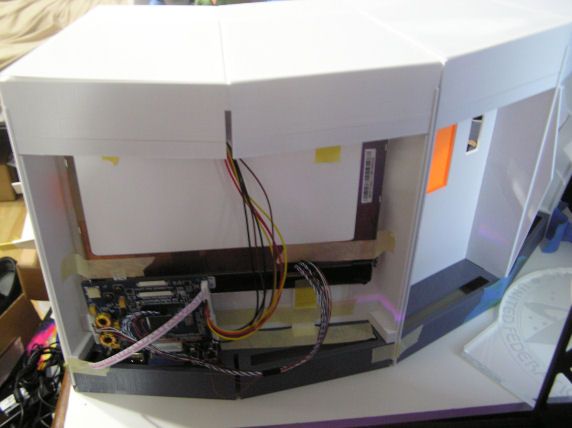
The viewscreen actually works and displays MP4 movies in HD via a Raspberry Pi computer embedded in the model. Arduino microcontrollers will be used to animate the chase lights under the viewscreen, the red alert lights, and the various blinking lights on the consoles.
You can see video of the viewscreen in action here:
Constructive comments welcome!

